How to create a training speech
It is simple to create a new speech for training. Simply open the feature in menu AI tools | Generate an AI speech and select the options available. The generation will take approx 15 to 20 minutes. Your standard web browser will be opened. You can play the speech using the player or download the speech on your computer.
Note
If you open this feature with a glossary opened, then some terms from your glossary will be automatically added to the speech!
Find Translations while Creating a Glossary
Use this feature When you are creating a new glossary manually. There are two methods to access this feature, each providing a unique interaction and resource availability:
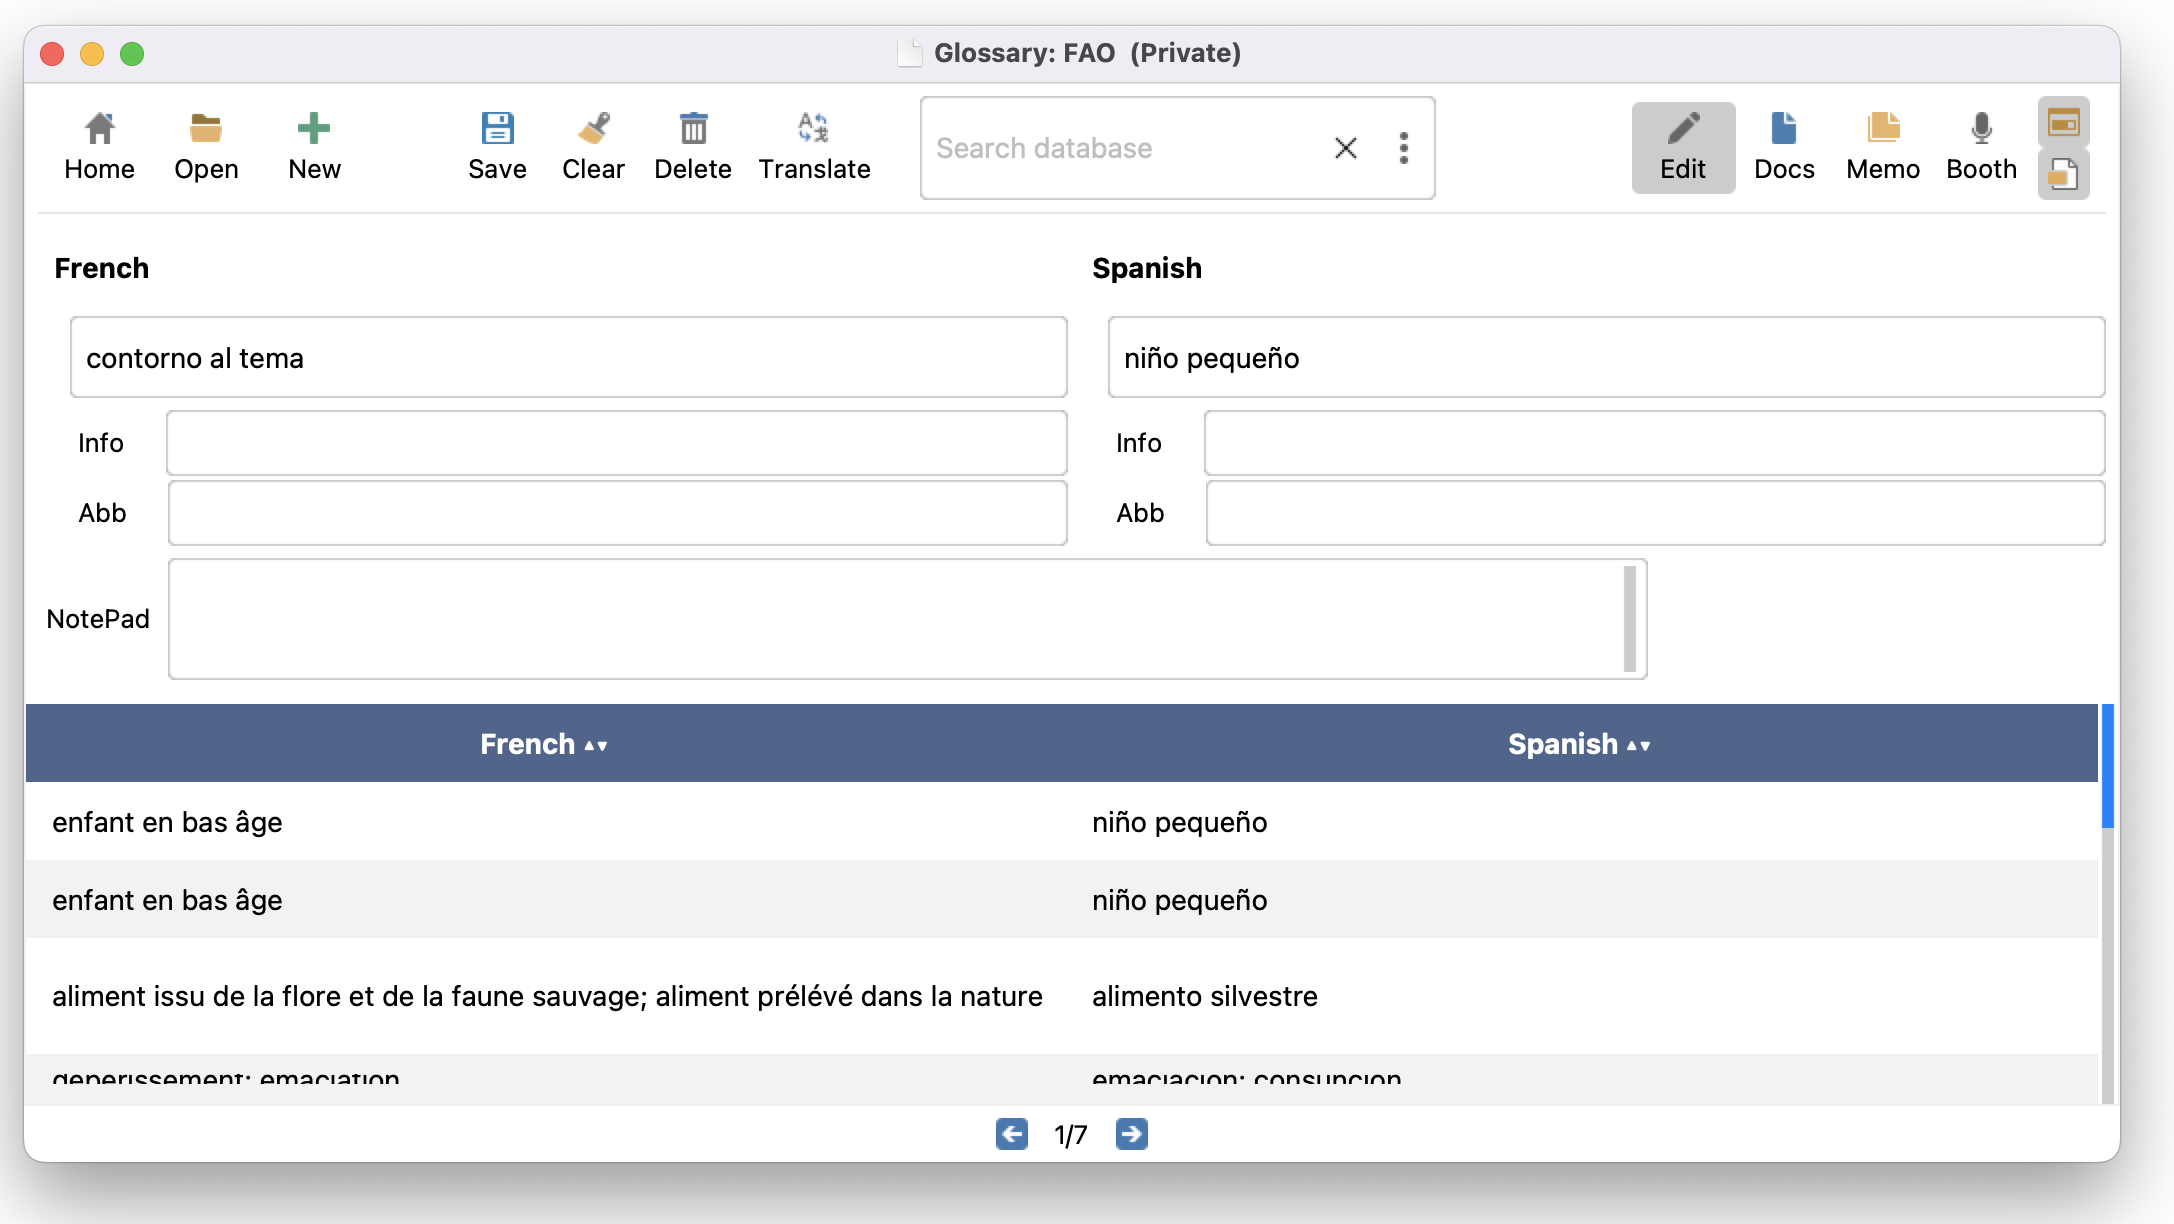
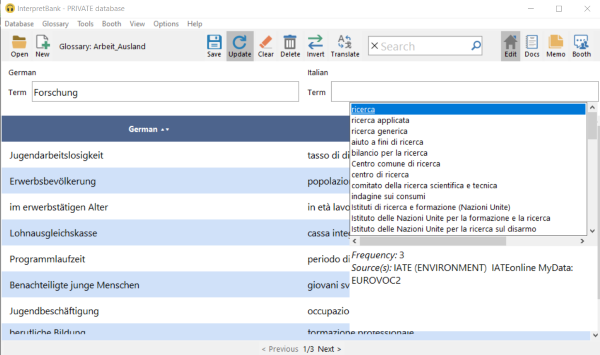
Translations are suggested directly within InterpretBank, allowing you to choose the best translation by double-clicking it. Here's how to use this feature:
- Enter a term in one language in the Term field of one language.
- Find a translation by:
- Pressing the function key F1 on Windows or Cmd+1 on macOS, or
- Clicking the icon
 , or
, or
- Right-clicking on a term field and selecting "Translate missing term."
A pop-up window will appear below the entry field that is missing the translation. Use the arrow keys to highlight a translation, review the information in the box below, and press Enter to confirm your choice. If no suitable translation is found, click in the empty entry field or press ESC to close the pop-up window without entering any translation.
Once all translations are inserted, save the entry using the save icon or the shortcut Ctrl+s (Windows)/Cmd+s (macOS).
The information box provides details such as:
- Score: Reflects the quality of the highlighted suggestion.
- Sources: Lists resources proposing this suggestion.
- Examples: Contains sentences with this suggestion from your preparatory documents (if available).
For glossaries with several untranslated terms, you can automatically translate all terms with menu AI-tools | Auto translate missing terms in open glossary. This operation is automatic and does not require user's validation.
Searching in alternative Web Resources
Translations can also be proposed in your default web browser by looking your favorite Web Resources. Enter or select a term missing a translation, right-click, and select Search translations/definitions in favorite Webpages, or use F2 on Windows or Cmd+2 on macOS. Results are displayed in your browser, and translations must be copied and pasted into your glossary. Configure this feature in the "Results shown in Web Browser" tab, and activate your favorite resources in Options | Settings | Translation resources (see Translation resources).
Create new AI glossary from Word/PDF
Automatically generate a multilingual glossary from a monolingual Word/PDF document.
How to generate the glossary:
- Click on menu AI Tools | Create new AI glossary from Word/PDF
- Give your glossary a name
- Select the desired glossary languages
- Select your document
- Click on Create.
Note
InterpretBank extracts terminology from the document and translates it into the target language(s). Supported source languages: English, French, Spanish, German, Italian, Portuguese, Dutch. Most target languages are supported.
Create new AI glossary from Webpage
InterpretBank can automatically generate a multilingual glossary from a monolingual website. This is useful to create a glossary from a corporate webpage. How to generate the glossary:
- Click on menu AI Tools | Create new AI glossary from Word/PDF.
- Give your glossary a name
- Select the desired glossary languages
- Input the URL of the webpage in the form www.domain.com
- Click on Create.
Note
InterpretBank crawls several pages of the given domain, extracts terminology, and translates it into the target language(s). Supported source languages: English, French, Spanish, German, Italian, Portuguese, Dutch. Most target languages are supported.
Create new AI glossary on a Topic
InterpretBank can automatically generate a multilingual glossary from any topic you describe. How to generate the glossary:
- Click on menu AI Tools | Create new AI glossary from Topic.
- Give your glossary a name
- Select the desired glossary languages
- Describe the topic your interested in, such as "nuclear energy" or "nails in the sense of body part". Your description should be very accurate.
- Click on Create.
Note
InterpretBank uses AI to generate a bilingual or multilingual glossary on the topic you describe. Most languages are supported. Bilingual glossaries tend to have higher quality than multilingual ones.
Extract key points from Document
InterpretBank can automatically extract some key points about a document to have a gist of its content:
- Click on menu AI Tools | Extract key points from Document.
- Select your document.
- Click on Create.
Note
This feature is performed entirely on your computer. No document is uploaded to the cloud for maximum privacy.
Speech Recognition (ASR)
InterpretBank ASR is the speech-recognition companion for interpreters. It provides live transcription and can surface terminology, names, and numbers while you work.
InterpretBank currently offers two ASR workflows:
- ASR Cloud: browser-based, fastest to start, and shareable. In Desktop, use AI Tools > Open InterpretBank ASR Cloud > With current glossary or Without any glossary.
- ASR Offline: local desktop application for on-device transcription. In Desktop, use AI Tools > Open InterpretBank ASR Offline.
In the WebApp, use Open ASR without glossary if you want transcription without a glossary, or Lookup with ASR if you want glossary support during the session.
Cloud sessions require Internet access and an active subscription. Offline sessions run locally after setup, but still require initial license validation and model downloads.
Refer to the dedicated manual here for supported languages, privacy details, microphone setup, and glossary integration guidance.
Note
For best results, test the audio source before the event. If you want the simplest path, start with ASR Cloud. If privacy or unstable Internet is the priority, use ASR Offline. For full setup instructions, use the dedicated ASR handbook.
Memorizing a glossary on the computer
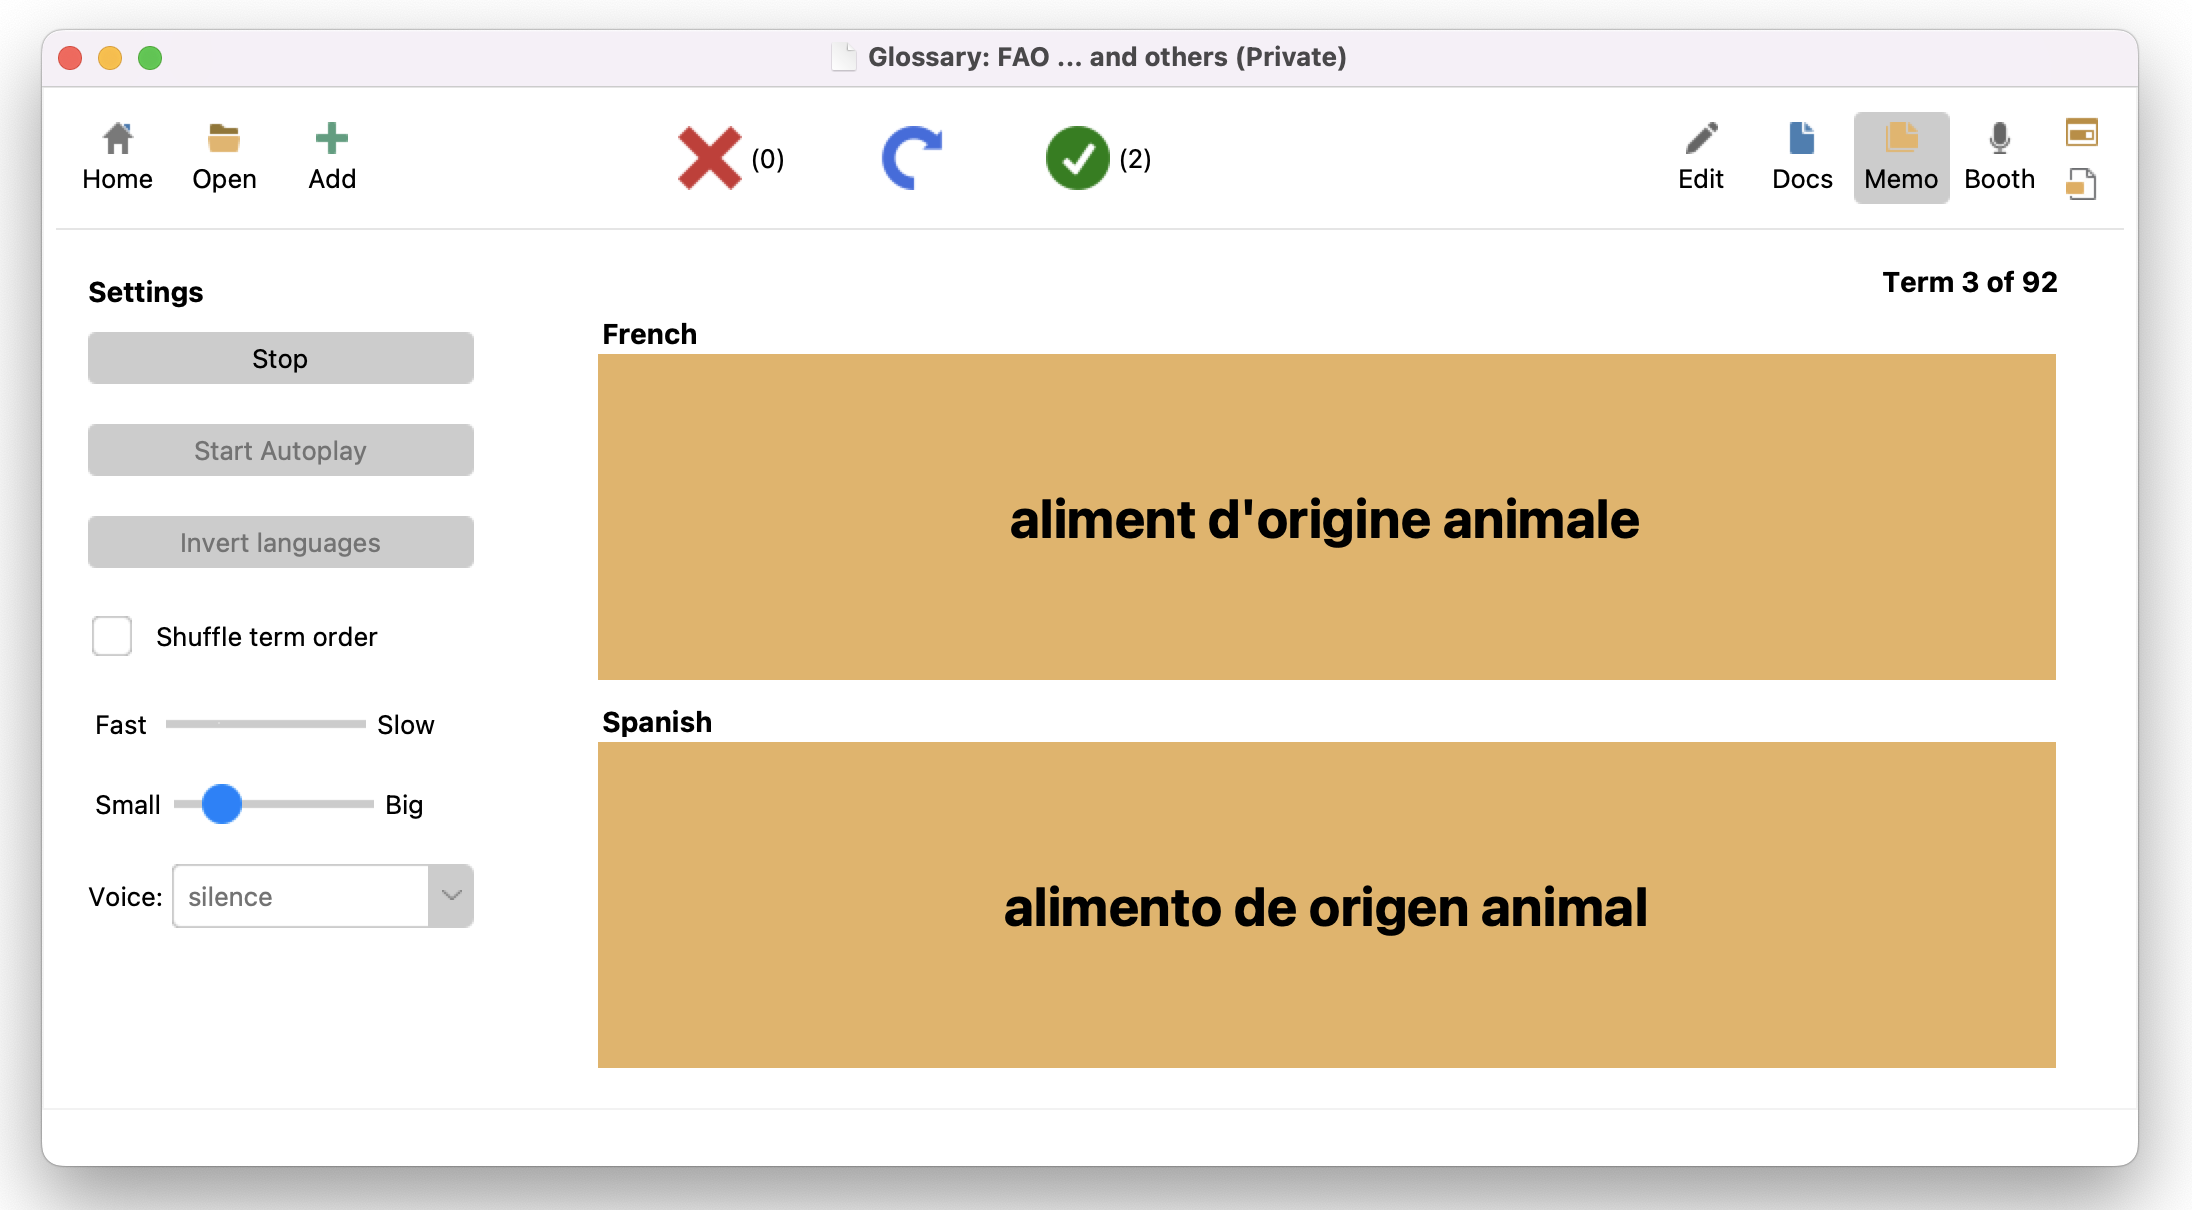
- Open a glossary (if a glossary has more languages than what you want to learn, change the table visualisation by right clicking the mouse on the table and hide the languages you do not need). Switch to the Memorisation view
- Start Manual (Start) or with Automatic advancing (Play). To set the speed of the automatic advancing, use the ruler.
- Activate Speak! if you want InterpretBank to read aloud the terms in the source language and, if you wish, in the target languages too (activate Only source if you want to be read aloud only terms in the source language).
- With the manual mode, advance the cards with the buttons on top. Click KNOWN if you knew the answer, or FORGOT if you did not. InterpretBank keeps track: next session it will show the FORGOT terms first, then the KNOWN ones.
- To swap the first two languages, click Invert.
- To shuffle the order of appearance, click Shuffle.
Note
The Speak! feature requires language packages installed on your system. See how to install voices for Windows 10 and macOS.
Memorizing a Glossary on a Mobile Device
To memorize a glossary on a mobile device, such as an iPad, please click here.
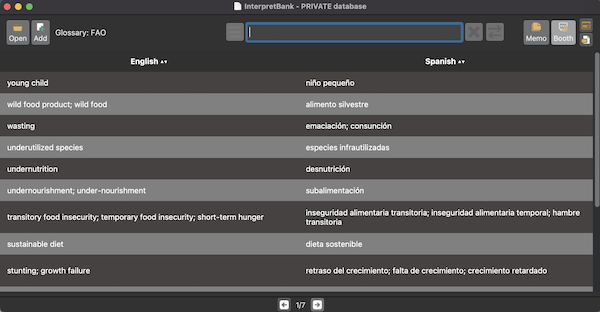
How Live Search works
The Live Search view is designed for fast term lookup while interpreting. The default settings work well in most cases. You can adjust behavior in Options | Settings | Live Search.
How your database is searched
In the Live Search view, InterpretBank can search in a customizable variety of resources. You can decide where the tool should search in Options | Settings | Live Search. With InterpretBank you can search:
- MAIN glossary (the glossary that you have opened in the InterpretBank's interface);
- MAIN glossary and in a set of EXTRA glossaries (MAIN glossary and EXTRA glossaries will form what we call the EVENT glossary);
- ENTIRE database (i.e. all your glossaries);
- EXTERNAL resources, like the integrated IATE database.
- AUTOMATIC resources, like online databases.
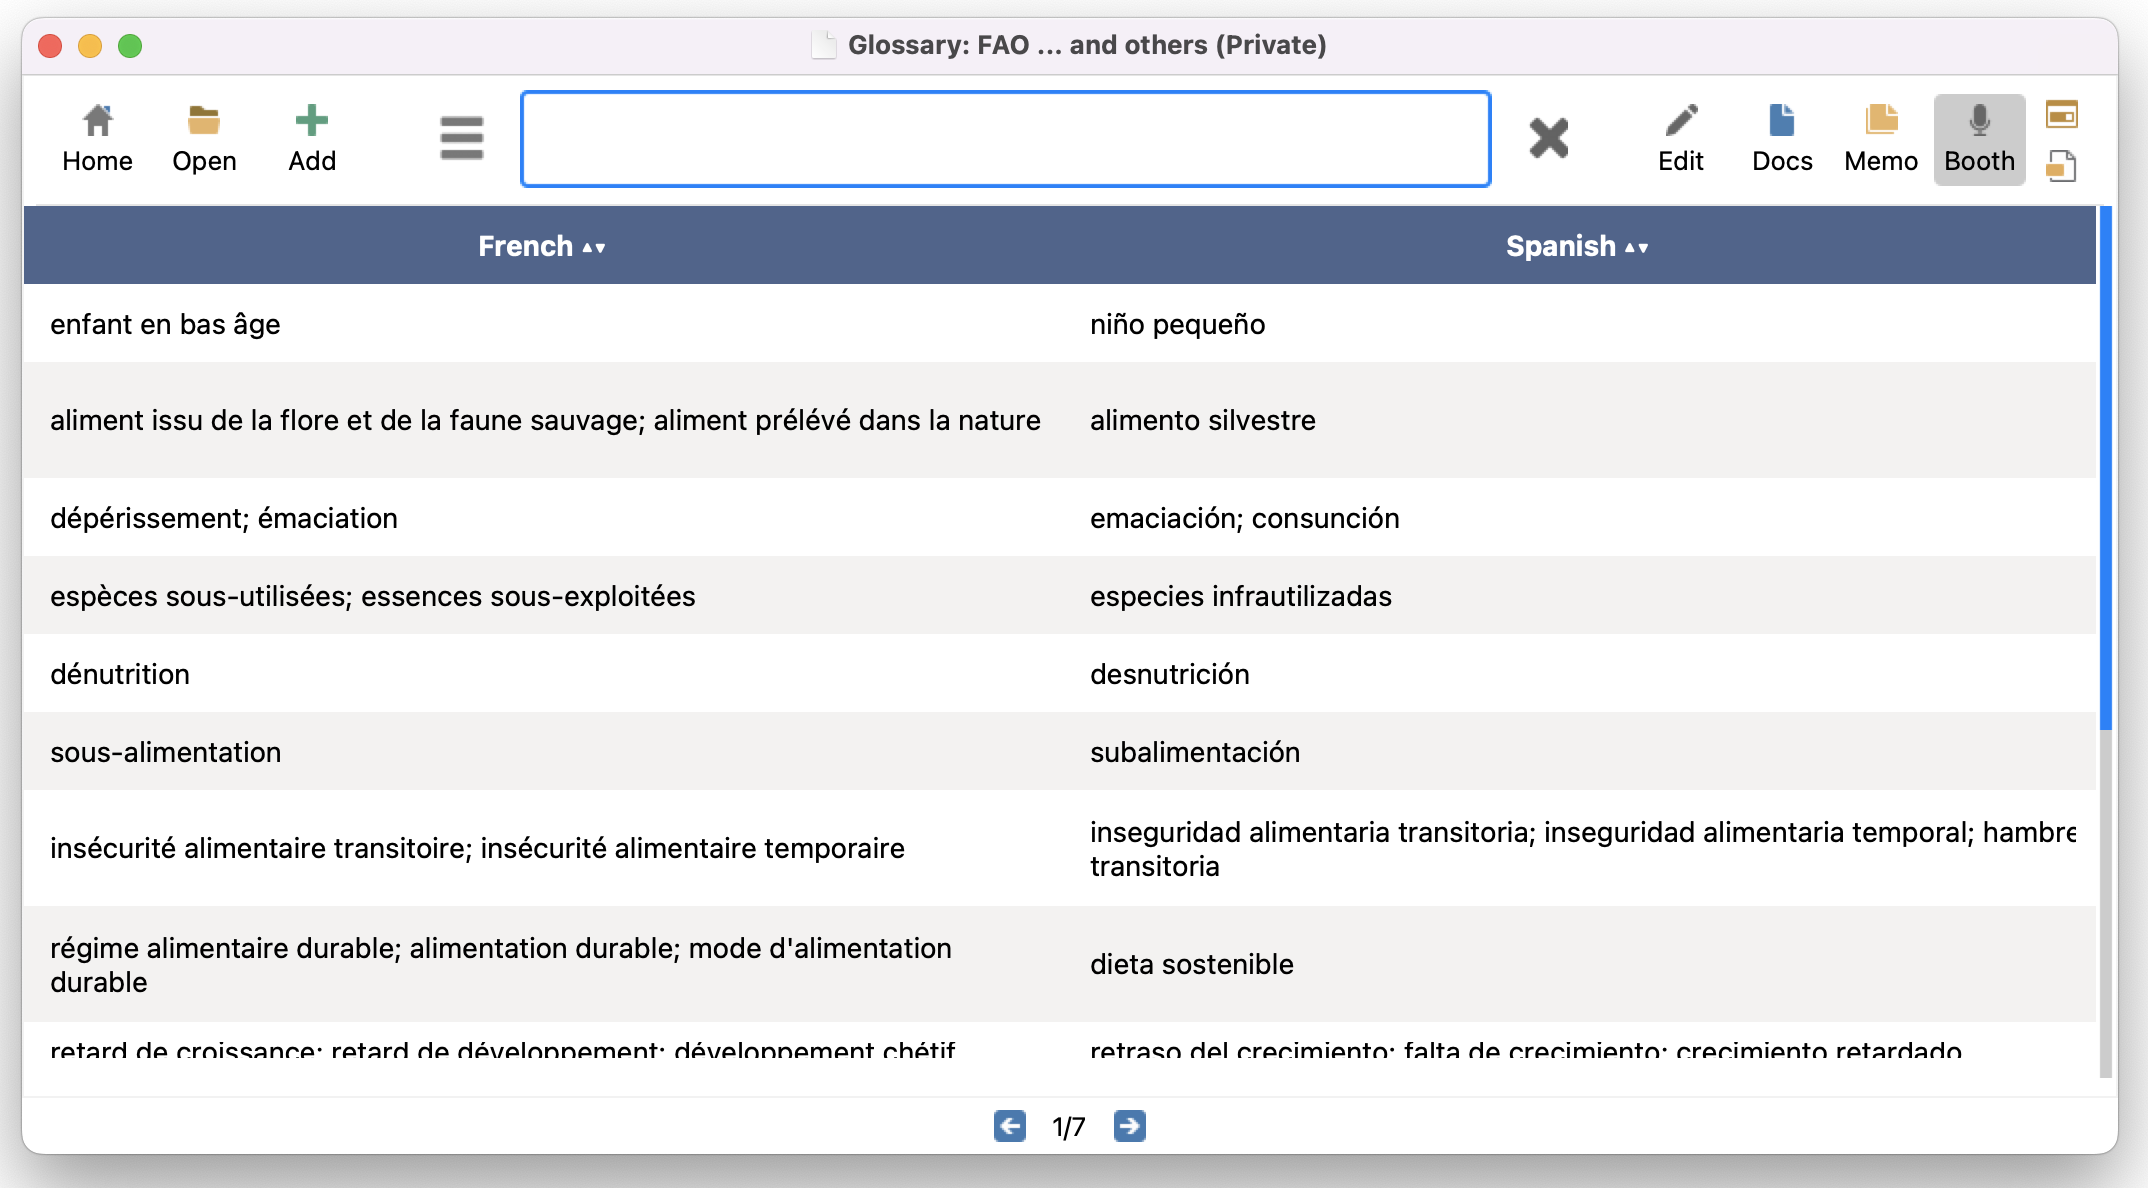
Open main glossary
To open a glossary, click on the icon  and select the desired glossary or subglossary. This will be your MAIN glossary.
Open more than one Glossary
In addition to the MAIN glossary, you can access other glossaries extending the search scope either by activating more glossaries using their specific names or by using tags associated with them.
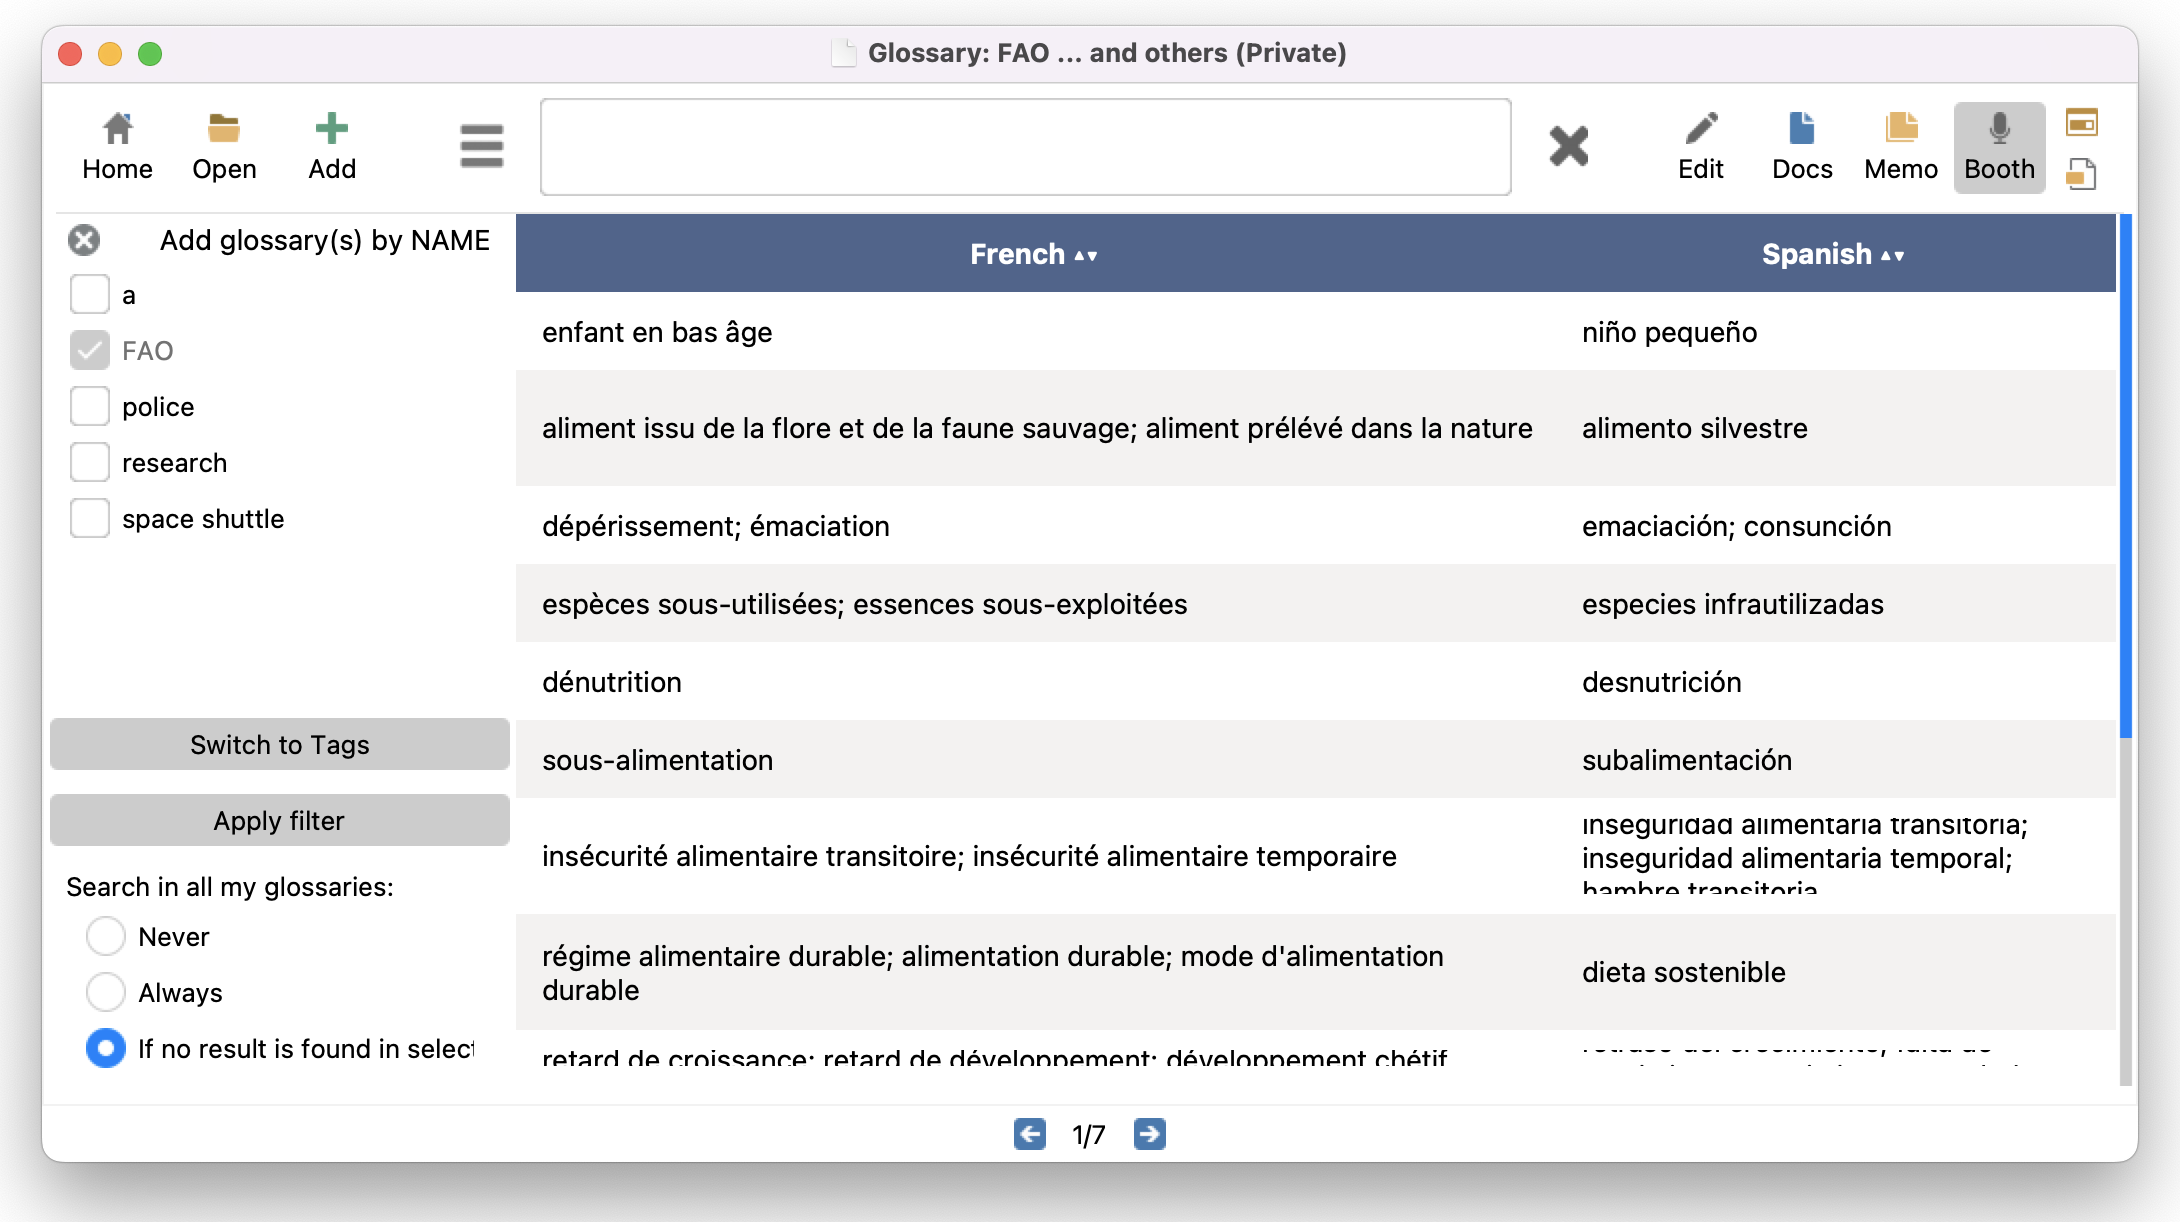
Open other glossaries by name
In the Live Search view click on the icon  , click on Add more glossaries by name or click on menu Live Search | Add more glossaries by name. A pane with all your glossaries will be displayed on the left part of the table. Select all the glossaries you want to activate in your current session.
Open other glossaries by tags
In the Live Search view click on the icon , click on Add more glossaries by tags or click on menu Live Search | Add more glossaries by tags. A pane with all your glossaries will be displayed on the left part of the table. Select all the glossaries you want to activate in your current session.
Note
Choose when InterpretBank should search your entire database. The default option, 'If no result is found in selected glossary(s)' (which includes the MAIN glossary and any other selected glossaries), is particularly useful when a search yields no results in your chosen glossaries. In that case, InterpretBank will automatically expand the search to your entire database. This search can be further extended to include external resources, such as your local copy of IATE, or online resources. You can configure this behavior by navigating to Options | Settings | Live Search in the menu.
Search Options
All options are in Options | Settings | Live Search.
INCREMENTAL SEARCH
- Search in all my glossaries: When enabled, the search expands to the entire database if no result is found in the selected glossary/glossaries.
- Local Translation Resources: Include offline resources (e.g., IATE) in search results.
- Web Translation Resources: Include online dictionaries and translation databases in search results.
INTELLIGENT SEARCH
- Case and accent insensitive: Ignore case and accents when matching — "cafe" also matches "Café".
- Show only terms that have a translation: Hide entries with empty translation fields.
- Correct typing/spelling errors: Return results even if the search term has minor typos.
- Search word matches: Match whole words only, not partial strings.
- Press Enter key to start search: Disable automatic search while typing; search only on Enter.
- Nr. of input characters to start search in entire database: Minimum number of characters typed before the full-database search activates.
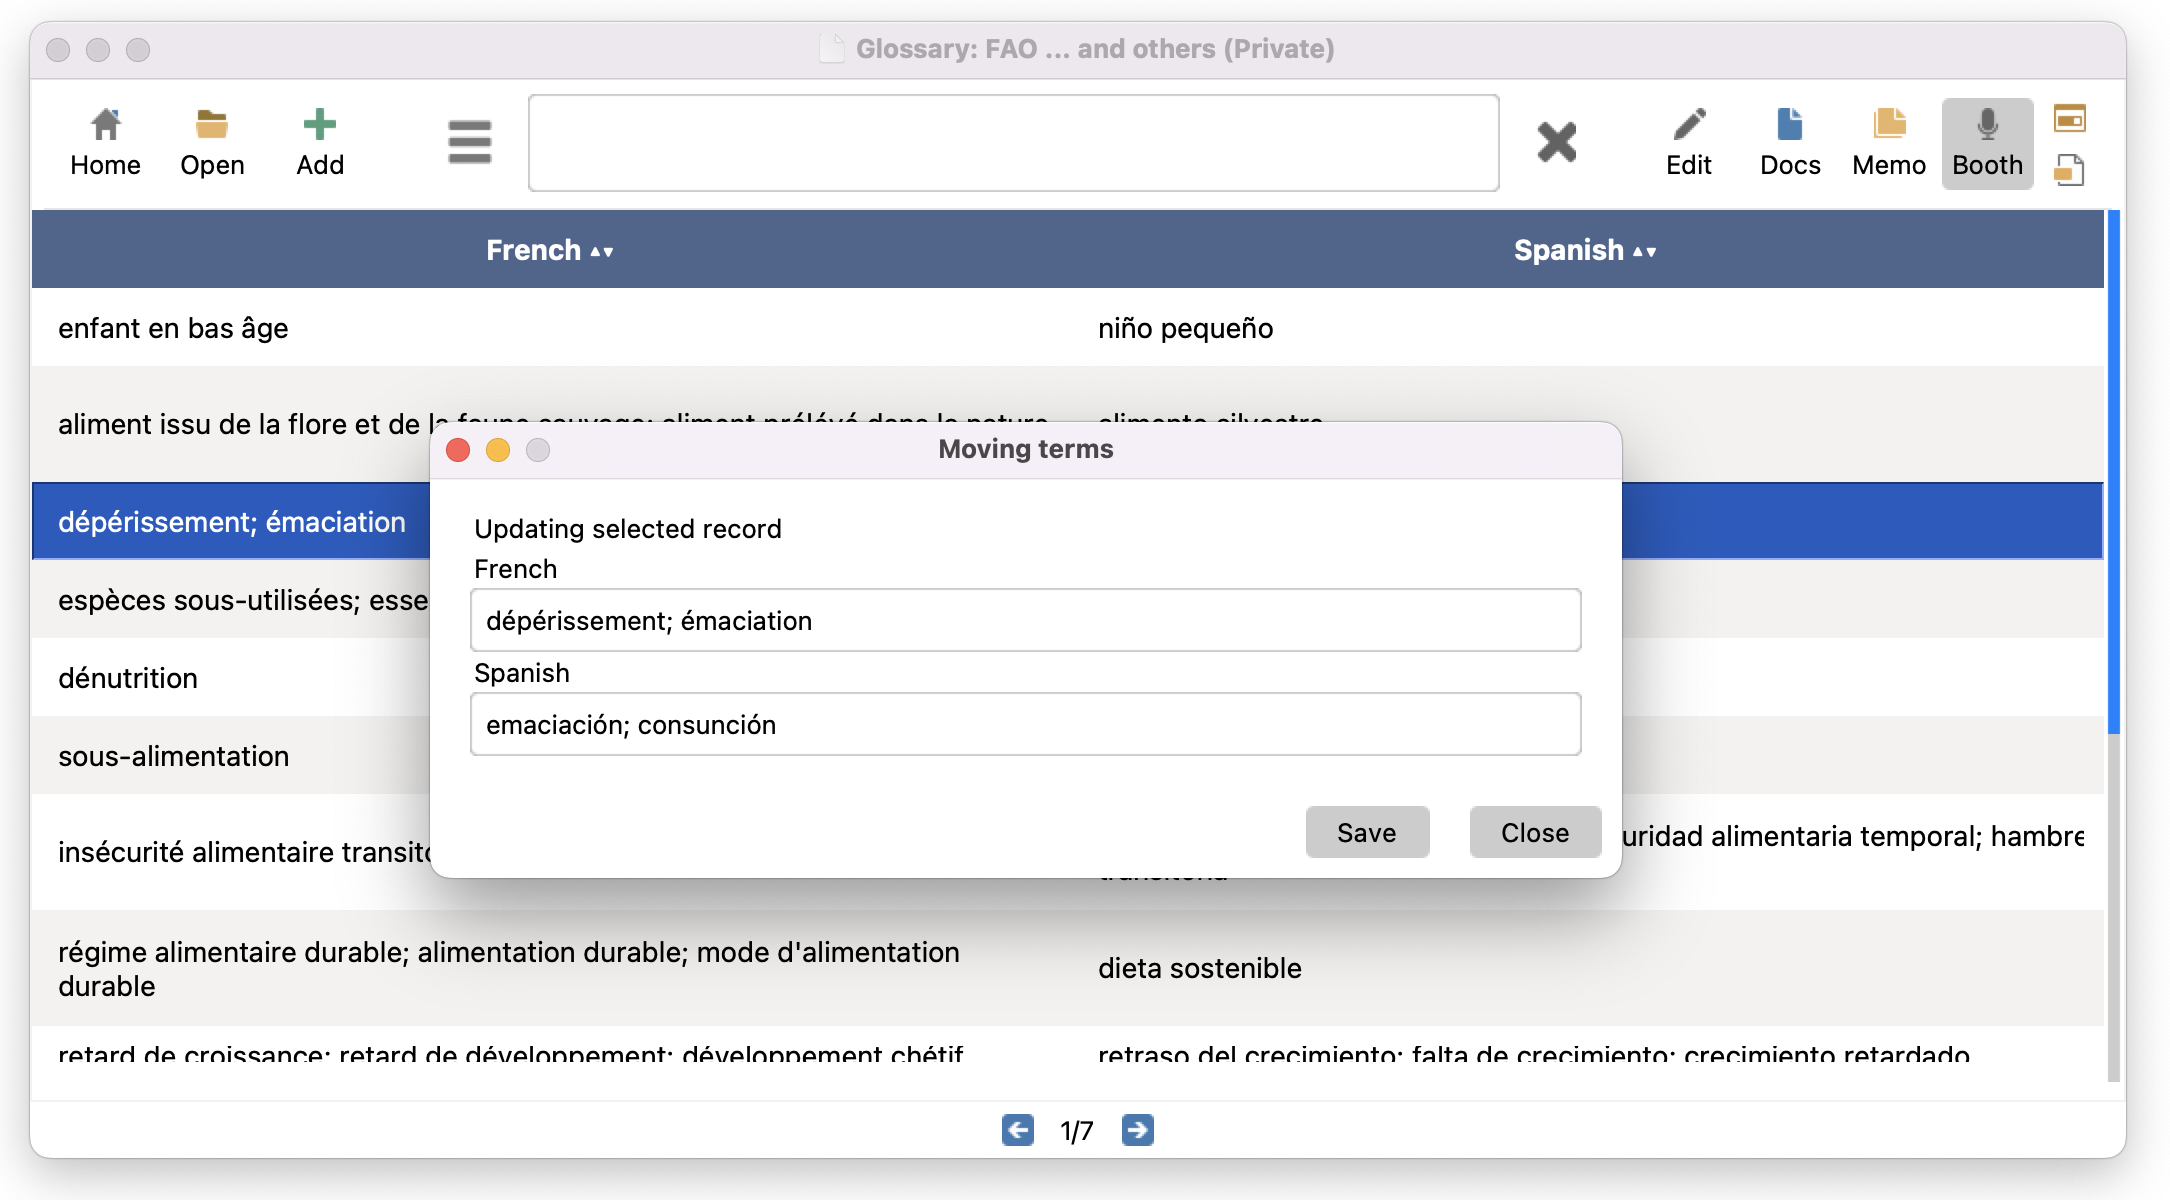
Updating/Adding terms on-the-fly
To update a term from the Live Search view, select a row in the table, right click of the mouse and choose Update selected term. A dialog window will be displayed. Update your term and click Apply.
To add a new term from the Live Search view, right click on the term on the table and choose Add term to main glossary. A dialog window will be displayed. Add your term and click Save.
Note
Note that the term will be added to the main glossary you have opened, i.e. if you have opened more than one glossary, it will be added to the first glossary you have selected from the Open Wizard.
Moving search bar
You can move the search bar on the top of the user interface. Go to menu Options | Settings | Live Search and activate the check box Set search bar on top. Restart InterpretBank to apply this setting.
Exchange a glossary between InterpretBank's users
Exchanging glossaries between users of InterpretBank is straightforward. To export a glossary (the format used is standard .tbx), open your glossary, then select menu Glossary | Export glossary | INTERPRETBANK (.tbx). Select the folder where you want to save the file and save it. Now you can forward the file to your colleague.
To import into InterpretBank a .tbx file received from a colleague, select menu Glossary | Import glossary into database | INTERPRETBANK (.tbx). InterpretBank will automatically import the glossary. If the .tbx file contains languages you do not manage in in InterpretBank, InterpretBank will skip them.
Export glossary
Open the glossary you want to export, then select menu Glossary | Export glossary | Excel. Select the folder where you want to save the file.
Import glossary
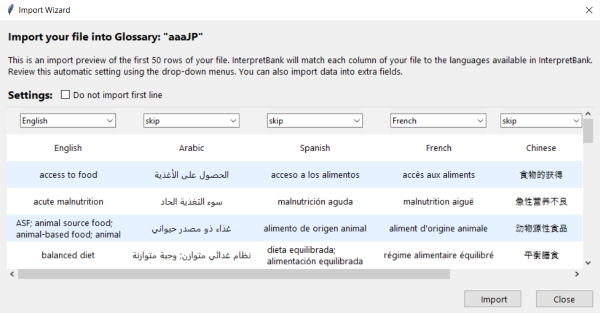
You can import glossaries stored in spreadsheets such as Microsoft Excel (.xls and .xlsx) and OpenOffice (.ods) as well as in text such as Microsoft Word (.doc and .docx) and Open Office (.odt).
To import a glossary, proceed as follows:
- In InterpretBank, open an existing glossary (the one in which you want to import your data into) or create a new empty glossary.
- Click on menu Database | Import glossary into database | EXCEL or WORD and select your file.
- In Import preview you will see your glossary as it will be imported in the database. InterpretBank will try to detect the languages of each column. Please check if InterpretBank has selected the right language for each drop-down menus. If not, correct the selection. Each drop-down menu should show the right language for the corresponding column. If a column should be skipped, please select "Skip".
- Select the option Exclude first row to exclude the first row of your glossary (useful if this row contains the language names). If this option is selected, the first row will not be imported.
- Insert the name of the glossary (and of the subglossary, if you wish).
- Press Import to import the file.
Note
Note for EXCEL: only the first sheet of your Excel file will be imported.
Note for WORD: please note that the glossary must be contained in a simple table; as Word files are not the ideal format to save structured data (such as a glossary), depending on the structure/formatting of your Word file, InterpretBank may have problems importing the glossary. The import works better with modern .docx files. We advice you to upgrade your .doc file into a .docx file using your MS Word program.
Note for OpenOffice: OpenOffice glossaries can not contain the character ";". Please substitute this character in your OpenOffice file before importing it.
Print
To print a glossary, open your glossary, then select Glossary | Print. The glossary will be displayed in your default Internet Browser. Use the print option of your Internet Browser to print the glossary.
The glossary will be displayed in the language and alphabetic order as shown in InterpretBank. To change the order of your terms, click on the table header of InterpretBank; if you want to change the column order, change it in menu View|Change glossary visualization. When the glossary is visualized as you desire, use the procedure described above to open your glossary in your Internet Browser and print it.
Backup
To backup the database, select Database | Backup | Backup personal data. Choose the folder where you want to save a backup copy of your database. Your database will be renamed with the current day and saved in this location.
To restore your database from a backup, select Database | Backup | Restore personal data. Specify the backup database you want to restore. This file will overwrite your current database. A copy of your current database will be automatically saved in your Personal folder.
Installation and database synchronization
You can open the WebApp in your browser at www.interpretbank.com/app. On supported devices, you can also install it as a web app. Open the browser menu and choose Add to Home Screen or Install app. This creates a dedicated icon on your device.
Database synchronization
Your Desktop database and your WebApp database are synchronized manually. No synchronization runs automatically in the background. This means you decide when to copy your data from the Desktop to the WebApp, or from the WebApp back to the Desktop.
After logging in, you will see your Dashboard. The Dashboard lists your glossaries and lets you open each one for lookup, editing, memorization, sharing, or deletion.
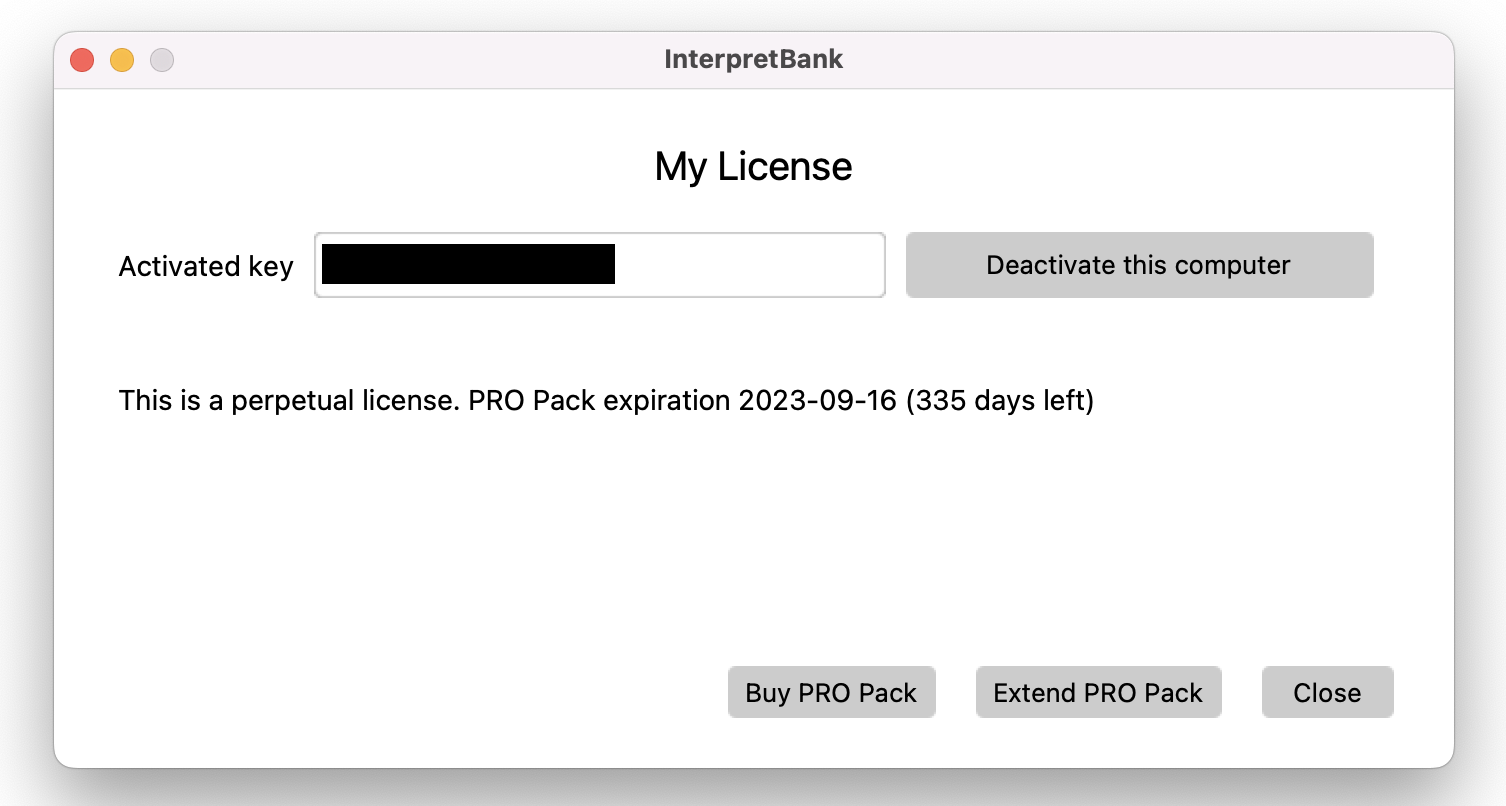
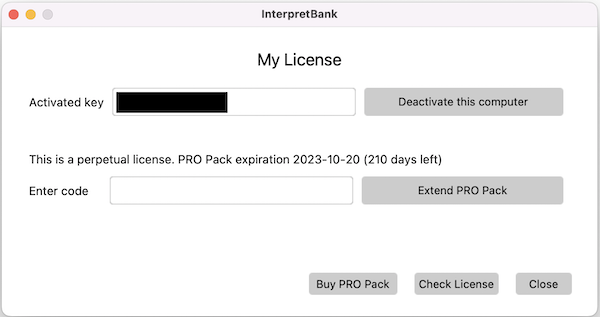
PRO Pack for Cloud/Support/Update
To use the WebApp, you need an active PRO Pack for Cloud/Support/Update. To check how long your PRO Pack is valid, open Help | License in the Desktop application.
Create a WebApp Account
To use the WebApp, first create a WebApp account from the InterpretBank Desktop application:
- Open WebApp | Manage WebApp Account.
- Enter a username, a password, and a valid e-mail address.
- Click Create cloud account.
- Confirm the terms and conditions by clicking Accept Terms and Create Account.
- Upload your Desktop database to the WebApp. This is required because the WebApp uses your database to read your language settings and make your glossaries available online. See Upload your Desktop database to your WebApp account.
- Open www.interpretbank.com/app and log in with your username and password.
Forgot or change your password
Your WebApp credentials are saved in your Desktop installation. Your password is encrypted. If you have forgotten your WebApp password or want to change it, do this from the Desktop application:
- Open WebApp | Manage WebApp Account.
- Enter your username and e-mail address, if they are not already shown.
- Click Change password.
- Enter your new password.
- Confirm the message and click Save new password.
Upload your Desktop database to your WebApp account
To copy your Desktop database to your WebApp account, open WebApp | Upload database to WebApp. After the upload, all glossaries from your Desktop database are available in the WebApp Dashboard. The upload may take several minutes, depending on the size of your database and the speed of your internet connection. Your database should not contain more than 100,000 records.
Note
Uploading overwrites the database currently stored in your WebApp account. This operation cannot be undone.
Download your WebApp database to the Desktop
To copy your WebApp database back to the Desktop application, open WebApp | Download database from WebApp.
Note
Downloading overwrites the database currently stored in your Desktop application. This operation cannot be undone.
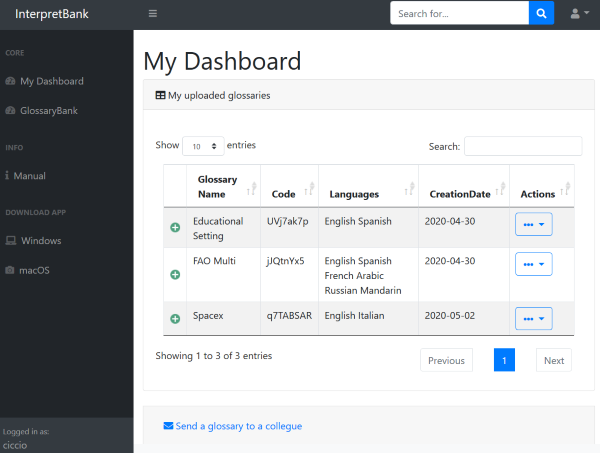
Dashboard
Use the Dashboard to open and manage the glossaries uploaded to your WebApp account.
For each glossary, the Dashboard shows the name, languages, upload date, and an Actions menu.
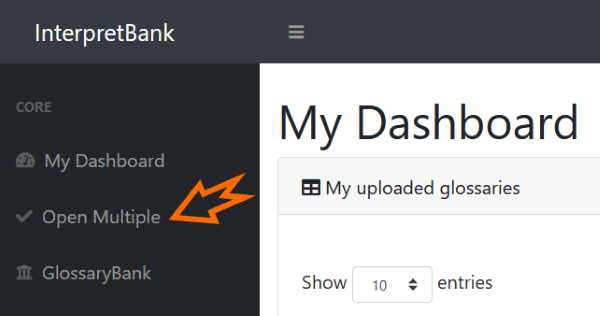
In the navigation bar on the left, the following shortcuts are available:
- Open multiple: Open several glossaries together.
- Stop sharing all: Stop sharing all glossaries you have shared in the past.
- ASR actions: Start an ASR session from the WebApp, with or without a glossary.
- Uploaded: See when the database was last uploaded from your Desktop.
Actions for individual glossaries
- Lookup: Open the glossary for lookup or editing.
- Memorize (classic): Open the glossary in the classic flashcard-style memorization view.
- Share: Send the glossary to a colleague by e-mail. You can decide whether the recipient can only look up the glossary or can also edit it.
- Stop sharing: Stop sharing this glossary with the people you previously shared it with.
- Delete: Delete the glossary from your WebApp account.
Look up multiple glossaries
To look up several glossaries at the same time, click Open multiple. In the popup, select the glossaries you want to open and click Open glossaries. You can then show or hide the languages you want to use.
Share glossaries with colleagues
You can share uploaded glossaries with colleagues. You can give them read-only access, or allow them to edit the glossary.
To share a glossary, open the Actions menu and click Share a glossary with a colleague. Enter the recipient's e-mail address and the glossary code, choose whether the recipient can edit the glossary, and click Send. The recipient will receive an e-mail with a link to open the glossary in the WebApp.
Search glossaries in your web browser
- Search is always accent-insensitive.
- Search usually starts automatically while you type. In some browsers, automatic search is disabled. In this case, click the magnifying glass icon to start the search.
- Press Enter to clear the search field.
- Use the menu on the left to show or hide language columns and to toggle the NotePad and Abbreviations columns.
Add a new version of IATE for offline search
InterpretBank is shipped with an offline version of IATE in five languages: English, French, German, Spanish and Italian as well with IATE online for all languages. The offline version is useful if you do not have an Internet connection. If you wish to use other languages in the offline version, you have to create a new InterpretBank's offline resource. The following procedure describes how you can import the official IATE database into InterpretBank:
STEP ONE - downloading the data:
- download the latest IATE from this link (it is a zip file +/- 124MB on 04/18, you do NOT need to unzip it.)
- download the tool to extract the languages you need from here (small file)
- the extraction tool requires JAVA. If you don’t have JAVA, please download and install it from here.
- open the extraction tool and select the downloaded data file (normally IATE_download.zip) by clicking on "Select IATE Export File" button and specify the output folder by clicking on "Set Extract Output Folder" button.
- Choose your languages (if you select more than one language, you can specify if the terms should be available in ALL or ANY of the selected languages);
- Click on Start and till the process is completed (it can take 10-30 minutes)
The whole procedure is described in the official IATE webpage here.
STEP TWO: Import this data in InterpretBank
- From menu Options, click on "Set automatic translation", then on the button "Add customized IATE".
- Select the file you have created in STEP ONE
- Wait until a window confirms that the process is finished (it can take several minutes, typically around 15 minutes), you can see the progress in the status bar (low part of the window). Do not interrupt this process.
If you can not perform this procedure yourself, you can buy the customisation from our shop. We will provide you with the database in your language combination ready to be used.
Add offline translation resources
You can add any personal bilingual dictionary to the automatic engine of InterpretBank. The dictionary must be available in text format (comma or tab separated values). The dictionary must have two or three columns (language one and two and, optional, a short info column). If you have a dictionary you want to import, proceed as follows:
- check that your file satisfy the parameter described above. The text file must be encoded in UTF-8-
- go to menu Options | Settings, tab Translation resources and click on Add customized dictionary
- in the dialog window, select the two languages of your dictionary (respecting the order left/right in your text file), select the column separator (comma or tab), give a short name to your resource, and select "Add third column to info field" if you want to add the third column of your file - if present - to the info field of each record
- click on Select text file and navigate to the file you want to import
- depending on the size of your dictionary and the speed of your computer, this process may take several minutes. Wait until the process is finished.
To activate this resource, go to menu Options | Settings, tab Translation resources and activate the new resource.
InterpretBank Connectivity Issues
To test InterpretBank's connection to its servers for tasks such as license activation or obtaining translation suggestions, go to Options | Settings | Interpret connection in the menu. Click on Check connection. The results should be indicated as OK (green), and you will also see the speed of the connection to the InterpretBank servers.
If InterpretBank cannot connect to the servers, first ensure your computer has internet access. You can do this by using your web browser to navigate the Internet.
The most common cause of connection issues is a proxy or firewall blocking access. This is common in secured IT environments such as institutional buildings and workplaces. In this case, contact your IT administrator for proxy details, which can be entered in Options | Settings | Interpret connection.
If your computer can access the Internet and is not behind a proxy or firewall, but InterpretBank still cannot connect to the servers, please restart your computer. This often resolves the issue.
Cancelling and Renewing a Subscription
If you have cancelled a subscription in the past and later subscribed to InterpretBank again, you will receive a new subscription key. You need to activate this new key, as the cancelled one is no longer valid. When you cancel a subscription and create a new one, the WebApp connected to the old subscription is deleted. You will need to activate the new subscription on the Desktop (menu Help | License), create a new WebApp account, and upload your database again.
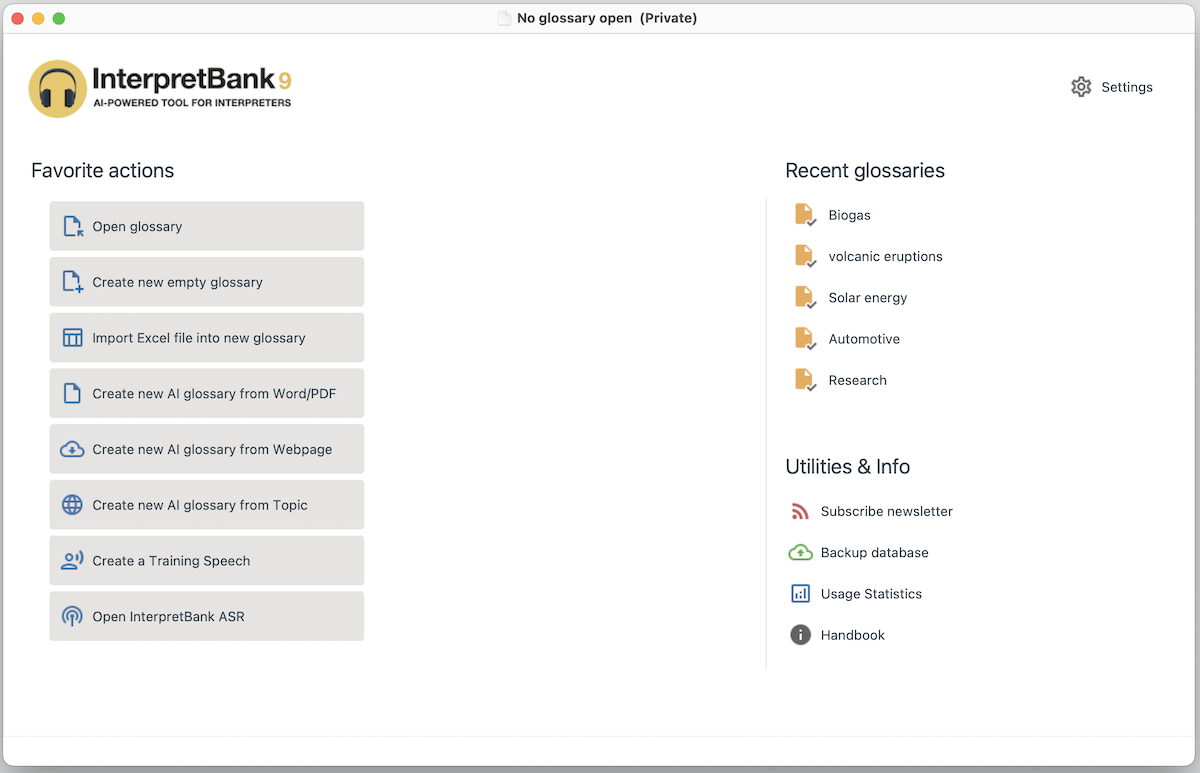

 EDIT: Create, review, and maintain glossary entries.
 DOCUMENT: Use preparatory documents to identify and collect relevant terminology.
 MEMORIZATION: Learn and review the terms in your glossaries.
 LIVE SEARCH: Look up terms manually while interpreting.
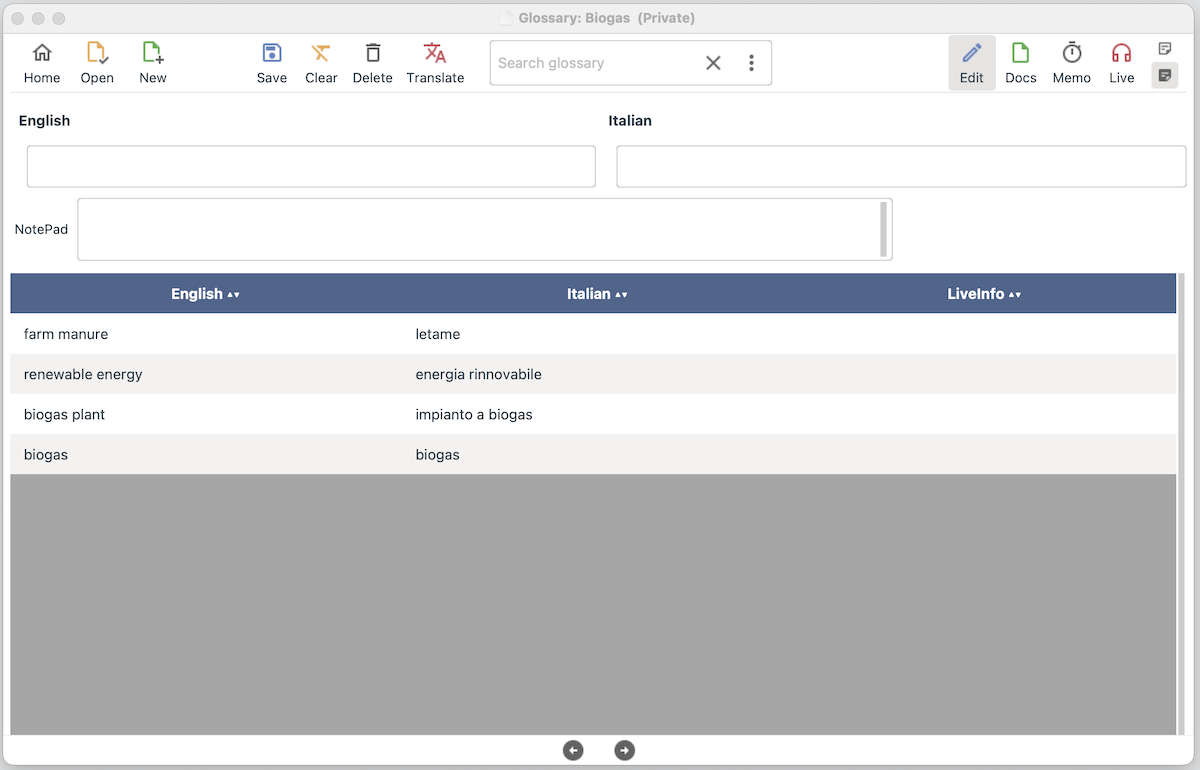
 in the Menubar.
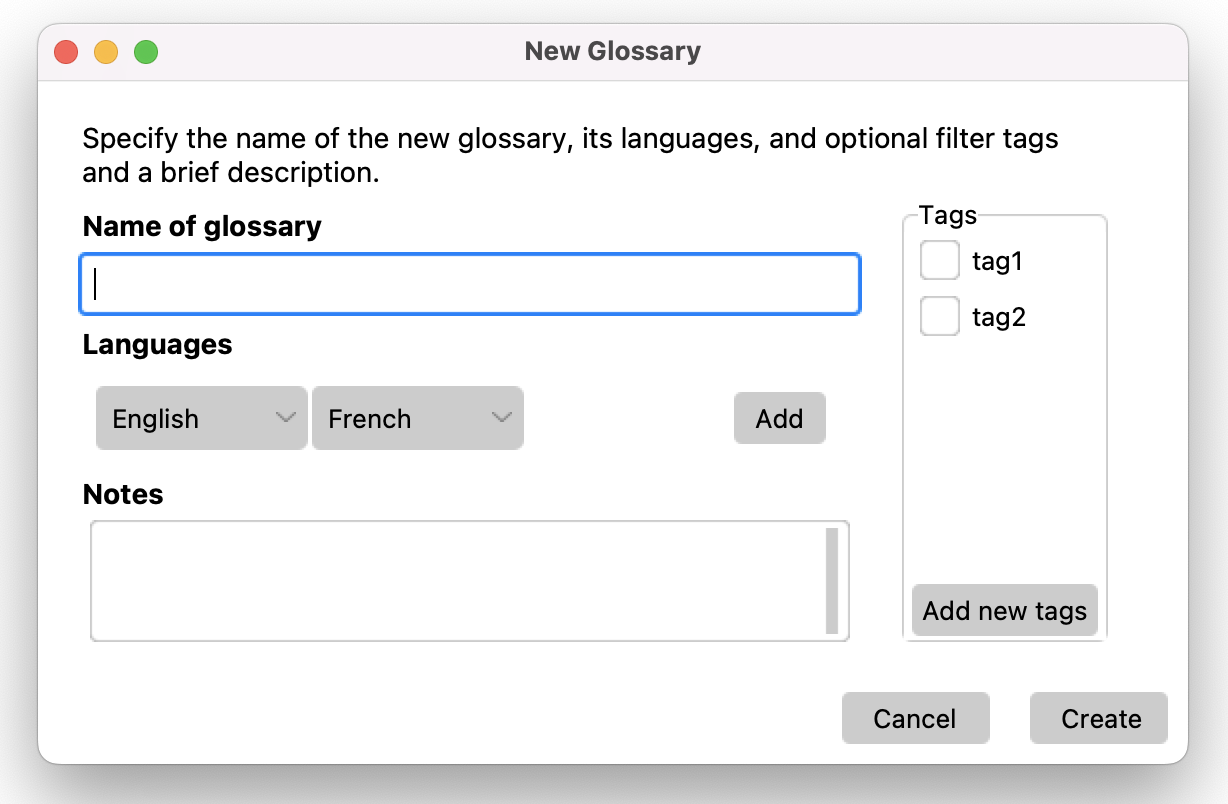
 . A dialog will be shown. On the left you can select the glossary, on the right the subglossaries contained in the selected glossary (if available). Make your selection and click on Open.

 Save: Click this button to save a new record inside the open glossary, or to update a selected record in the table (the highlighted row). Alternatively, you can perform the same action by pressing the Enter key.
 Clear: Use this option to clear all entry fields without deleting the record itself from the database. The Clear icon is handy to deselect a previously selected record, preparing the interface for the entry of a brand new term.
 Delete: Select the record in the Table, and then press this icon to delete the term from your database. Please note that this action cannot be undone once you confirm in the subsequent window.

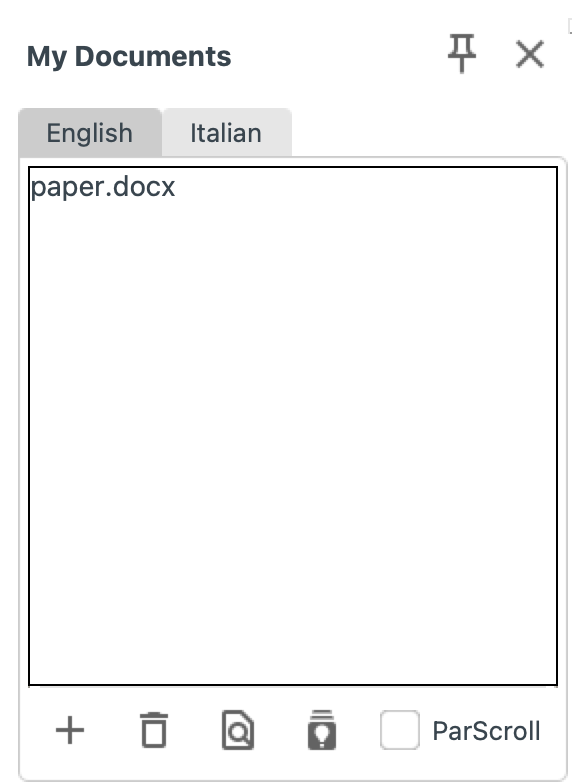
 you can choose whether to open the document inside InterpretBank or in its original application (such as the standard PDF Viewer and MS Office/PowerPoint).
 to enable multi-selection, highlight the desired terms, then click
  to import them. To deselect a term, right-click and choose Remove selection. See
  to activate multiple selection, select all terms of interest, and click on
  . Then, choose your desired action:
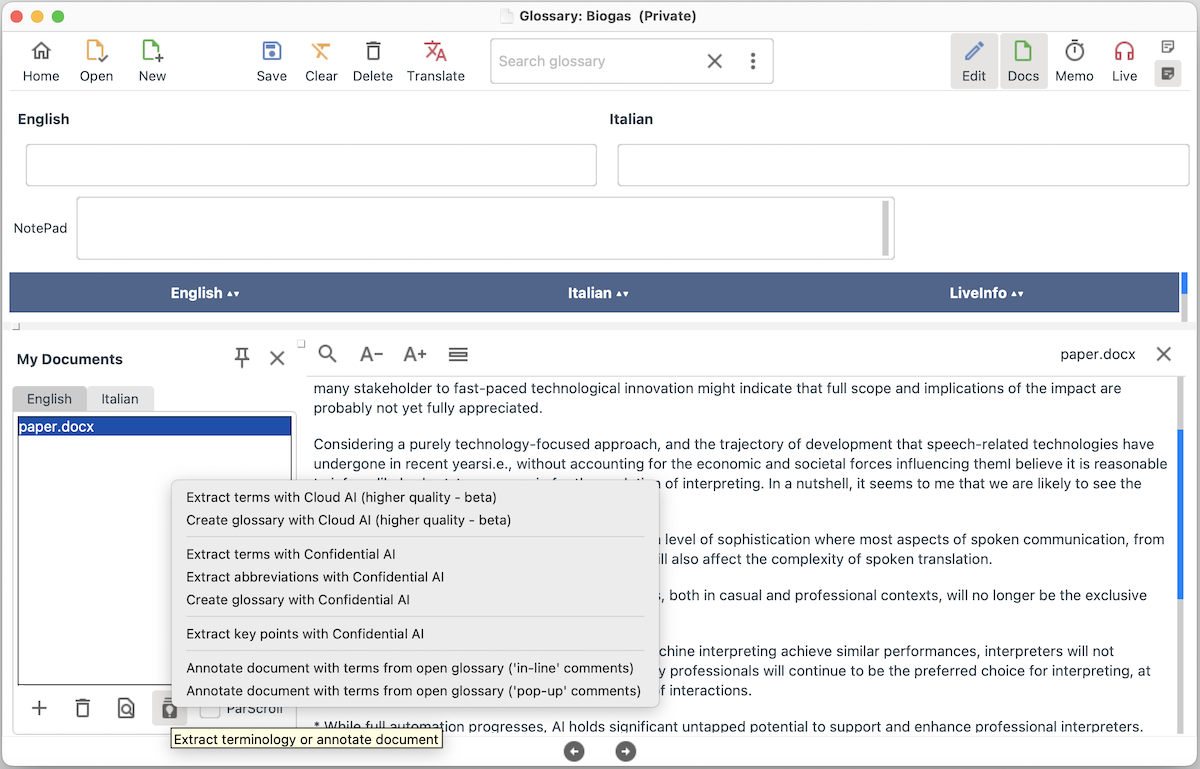
 Search the term in the preparatory documents to understand the context of use
 Mark the term as "not interesting to me". InterpretBank will learn from this choice in future extractions.
 . You can also use it on mobile device, for example on your iPhone, read